Saturday, June 25, 2011

New Richard Louv Book

The Nature PrincipleI am currently reading Richard Louv's newest book, The Nature Principle which builds upon his work for Last Child in the Woods but focuses this time on adults.  If you haven't read Last Child in the Woods yet, it's worth a read (or rather, a listen - Louv's writing style packs a lot of varied information into several hundred pages and I think his books are an easier "read" via audiobook during the commute or on a long road trip).

In Last Child in the Woods, we learned about how modern life has created a new epidemic in children, something Louv called Nature Deficit DisorderThe Nature Principle is packed with information on studies and experiences suggesting that adults, too, can have Nature Deficit Disorder.  There is a lot of evidence that many of our common psychological ailments (depression, schizophrenia, etc) are either caused by lack of nature exposure or can be corrected or eased by nature therapy.

We probably haven't done enough research on nature therapy for specific diseases, but I definitely buy into the concept of nature as a healing force.  When my husband, Nathan, worked in Glacier National Park and I would take a week away from my highly stressful software engineering job to hike and be completely disconnected from the grid, my whole outlook on life changed.  I thought that was just because I was on vacation, but there is a big difference between how I feel after a week in a European city and how I feel after a week in the backcountry.  I think Louv is on to something.  Check out The Nature Principle if you're interested in learning more!

Case in "point": I am one happy hiker in this photo!
Pitamakin Point - Glacier National Park - July 2007

Friday, June 24, 2011

Coming to you from DC

I realize this blog has basically shut down for the past ten months, but I can't say that I didn't expect this to happen.  Having the baby has been an amazing and humbling experience.  I now liken parenting to engineering or being a doctor in that it takes up most of your time and you end up doing a lot of troubleshooting.  That being said, I have learned A LOT about parenting in the last ten months and am brimming with eco-topics for this blog.

First, you should know that some things have changed in our personal lives (beyond the normal shock of becoming a parent).  The biggest is that we've moved to the Washington DC area!  My husband, Nathan, is now a Park Ranger on the National Mall and we live in an apartment complex in Alexandria, VA.  While I LOVE having a million kid-centered things to do every day and a great public transportation system, living in the middle of urbania, with its traffic and non-existent yards, has forced me to be more creative in how I keep nature a central part of Alison's life.  It is not easy and I'll be discussing this in future posts.  Perhaps some of you can relate and share your good ideas with me as well!

 May 2011 - Alison enjoying the waterfront in Old Town, Alexandria

Finally, I decided to turn on the blog ads.  I figure anything we earn (probably close to nothing) can go straight to Alison's college fund.  Hopefully you can just ignore the ones you don't care about and enjoy the blog content.  I'm looking forward to posting weekly on Saturdays, so stay tuned!

Friday, December 10, 2010

Recreating with Kids

I found a great website thanks to this Sierra Club article with tons of ideas and stories about how to get kids out and about: http://www.recreatingwithkids.com/.  The site is geared towards more active outdoor sports.  So, don't expect to find tips on what to do with your two-year-old at the park, but rather some fun ideas of what's going on in the world of hiking, biking, skiing, etc for kids that are a bit older.

The site is based on Eugene Buchanan's book, Outdoor Parents, Outdoor Kids: A Guide to Getting Your Kids Active in the Great Outdoors
 I haven't read it yet, but like the website, so check it out.


Friday, October 8, 2010

Sew Your Own Nursing Cover

Life with the baby has been excellent so far and I've decided to really embrace my domestic side by taking on a sewing project!

I am breastfeeding, and while it has been a lot harder to master than I expected, we've been able to overcome the various challenges so far (thanks a lot to the babycenter.com breastfeeding board and La Leche League).  I consider breastfeeding to be a very important part of being an eco-mom because, not only am I giving my baby the healthiest, most natural food on earth, but I'm saving money, packaging, and transportation waste also!  It's completely worth sticking through the tough moments.

To aid in making breastfeeding more comfortable in public, I decided to create my own nursing cover.  I could have bought one for around $32, but the covers are so simple and making one allows me to choose the fabric, design, and saves me a ton of money.

Instructions
I used these instructions from blisstree.com for my own cover, making a few adjustments just for me.  I spent $9 for all of the supplies and about two hours to finish the cover (if you are an experienced seamstress, this should take you less than an hour - I spent a lot of time ripping out seams when I screwed up).

Adjustments I Made
For fabric, I would have liked to buy organic, but the only store within an hour of me that sells fabric doesn't carry any.  I ended up with a lightweight cotton, which I hear from other moms is important as the baby can get pretty toasty under the cover.

 Neckline with straps fastened

I made the long strap only 24" long and that was plenty (possibly still a bit too long).  I also decided to use velcro as the fastener instead of the D-rings.  Since I am creating this cover just for me, it was easy to figure out just where I wanted to fasten the strap, then sew in the velcro right there.  I just figured I wouldn't want to be messing with the D-ring, behind my head, with a crying baby, in public.  The velcro should be much easier.

 Velcro - Note the thread gets all bunched up while sewing this on.  I'm sure there's a better way to do this, or possibly you may just want to sew these on by hand or get the stick-on fabric kind.

Finished Product
Here it is!  My first major sewing project in probably 15 years!!


Tuesday, September 7, 2010

Alison's Here!

The wait is over!  Alison Savannah was born 9/2/10 at 3:16am!  She weighed 7 lbs, 14 oz and was 20.5 inches long.  Technically I'd been in labor for 21 hours after my water broke, but things were not moving along as we would have liked and we ended up having a C-Section to avoid the risk of infection that sets in after your water has been broken 24 hours.

As many of you know, I was looking forward to a natural labor with no drugs (if possible), but as soon as I heard this little cutie bean cry, I realized we'd done the right thing.  I can't explain how incredible she's been so far and how fun it's been being a mom!  We're both doing great!

Even though I'm pretty sleepy, I think we got off pretty easy (so far)!  Alison only cries to tell us she's hungry and only wakes up a couple times per night (only once last night)!  She's a champion sleeper and really curious.  We're pretty sure she said "hi" the other day. :P  Not much more I can say right now, so I'll let these pictures do the talking.  I love my little Allie Bean!


Just Born!


Wednesday, August 18, 2010

Homemade Baby Food in Ice Cube Trays

Even though this baby won't be eating solid foods for at least six months (no, she's not born yet - six days until my due date!), I've started to think about what I can feed her when the time comes.  I plan to make my own baby food and got a food processor from a friend as a baby shower gift.  I love that I've already been able to use it to make hummus and virgin margarita jello cups.  It's one thing I didn't mind acquiring as part of the vast flood of baby items!

I've been sent repeatedly to an awesome site with recipes and food storage tips.  This seems like a one-stop shop for all of your homemade baby food questions: http://www.wholesomebabyfood.com/.

What I didn't realize was that you can't just grind up what you're having for dinner and feed it to the baby the first time you introduce solid foods.  I'm told food introduction should be done gradually and one food at a time, until your baby is comfortable with a variety of foods (and to better distinguish foods they might be allergic to).  So that leaves you with the problem of how to make tiny portions of one kind of food at a time.

Solution: A lot of people will make batches of a particular food and freeze it for up to one month.  The neat trick I learned today is to use ice cube trays.  It simultaneously helps you save it in chunks small enough for a baby meal, and also conserves space in your freezer (plus you may not need to buy any new equipment)!

If you don't have ice cube trays already, they make some with lids just for baby food

Fresh Baby So Easy Baby Food/Breast Milk Trays

Once the food is frozen, you can pop it out and store it in a ziplock bag until you need it (then reuse the tray for another type of food).  This should be easier than I imagined.  I love elegant, green solutions using stuff I already own!

Sunday, August 8, 2010

Prepping Your Cloth Diapers

It seems intuitive to me that you should wash your cloth diapers before using them, but I didn't quite understand why some women talked about their elaborate rituals for "prepping" them beyond one wash so passionately.  I'd read a lot of interesting stories about cloth diaper prepping, including recipes for boiling new diapers in what can only be described as a witch's brew of sorts (minus the toad's feet) and people who wash them 8-10 times before use.

Why?
It turns out there is some rhyme or reason to prepping your cloth diapers:
  1. Some cloth diapers have some agents left over from their factory processing.  One wash should get rid of those and soften up the diapers.
  2. Cotton shrinks and cloth diaper manufacturers have taken this into consideration.  If you don't wash your diaper liners to pre-shrink them ahead of time, the fit may be wrong the first couple of times you use them.
  3. After a few times in the dryer, cloth diapers fluff up and reach their full absorbency potential.

How?
Just like the rest of parenthood, people develop their own style when it comes to prepping cloth diapers.  Some people simply boil them.  Others wash them multiple times.  I thought the 8-10 washes theory was a bit much, so I settled for washing (and drying) them three times (why three?  because third time's the charm, of course!).  I decided to do this in cold water to be more eco-friendly and am trying out a cloth diaper detergent that I've heard many a mom rave about: Rockin Green.  I only used detergent in the first wash, then just water for the others.

Above all, I think the best advice I've found is that you know your diaper prepping is working when you can pour some water on them and it gets absorbed, instead of beading up.

Results?
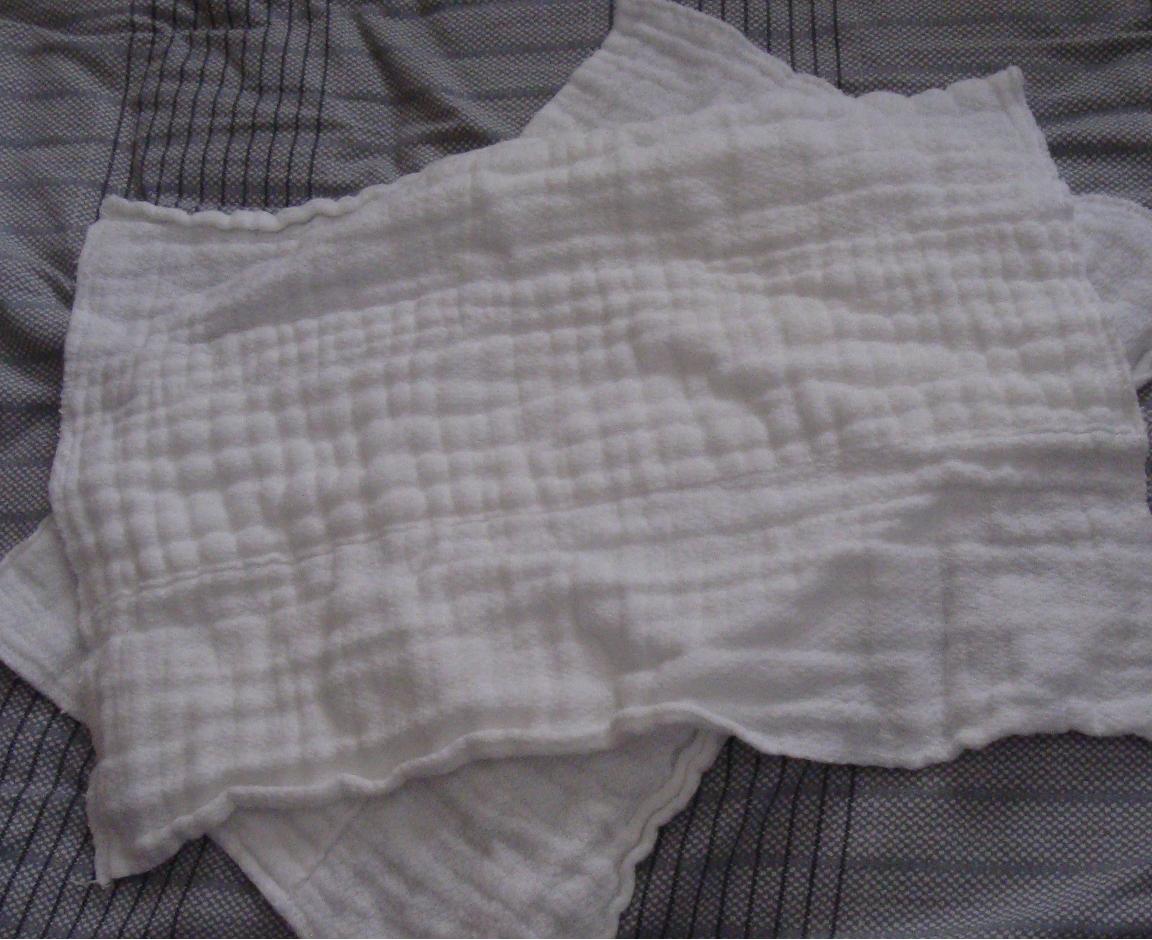
There was a noticeable difference in diaper volume after just the first wash/dry cycle.  I'm not sure that the second and third washing did much, but you can definitely see the difference between the prefolds I washed and the out-of-the-box ones.


Post-Prepping

 Gerber Brand 6 Pack Prefold Birdseye Organic Diaper, White
 Pre-Prepping

Before I washed them, they seemed a bit thin and were in some places see-through, but they seem much more up for the job at hand now!

 TWO MORE WEEKS before I'll be able to try out their REAL absorbency.  I hope they work!